

Here are the instructions to set up SPF and DKIM authentication for your domains. You will need to add 3 TXT records to your domain’s DNS settings. You can add these records in one of 2 locations, either at your domain registrar or web hosting service provider.
This option is for users who have registered a domain name but don’t have a website. This example uses Namecheap.com as an example but the method is similar for other domain registrars.
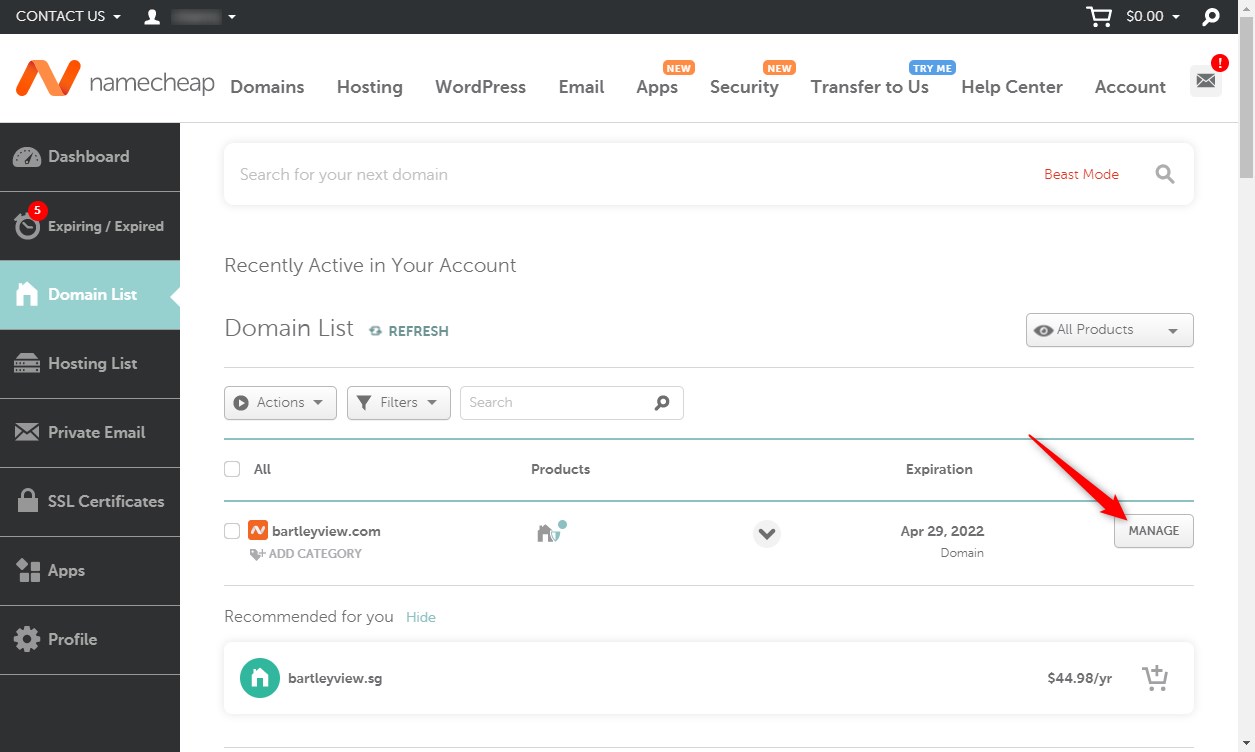
To begin, login to your Namecheap account. In your domain list, click Manage to bring up your domain settings.
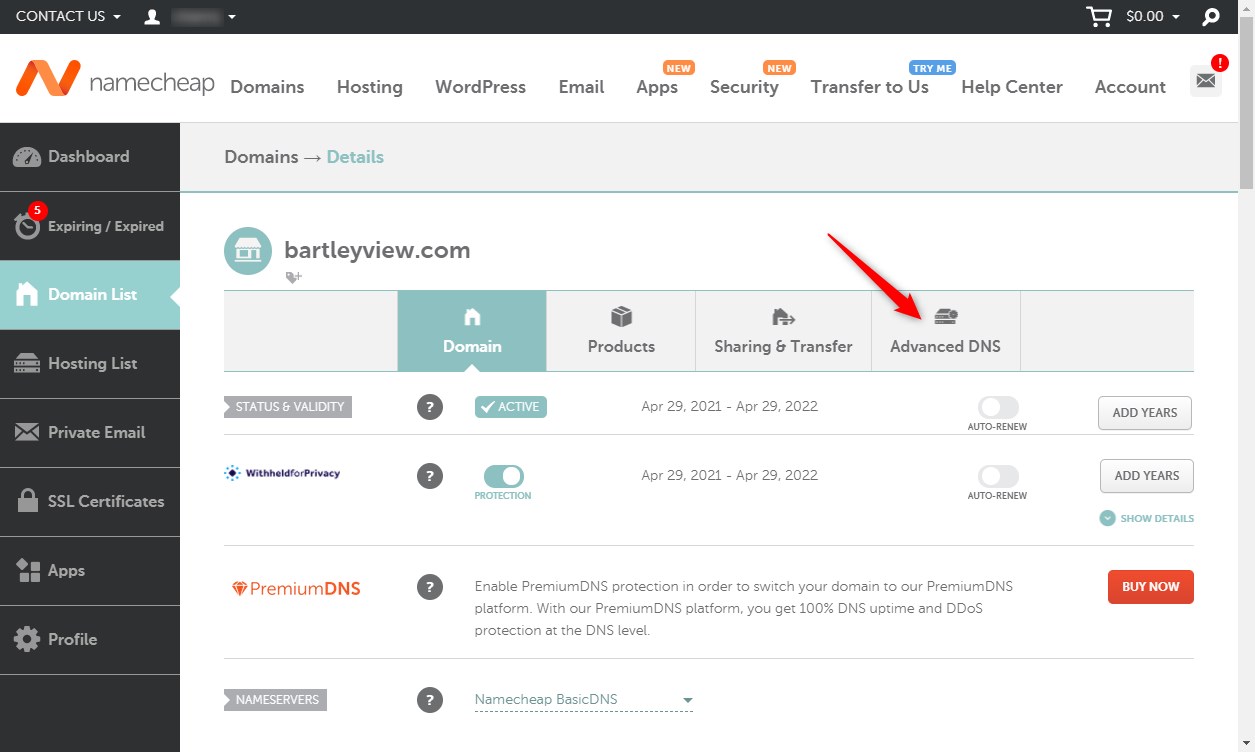
2. Click on Advanced DNS
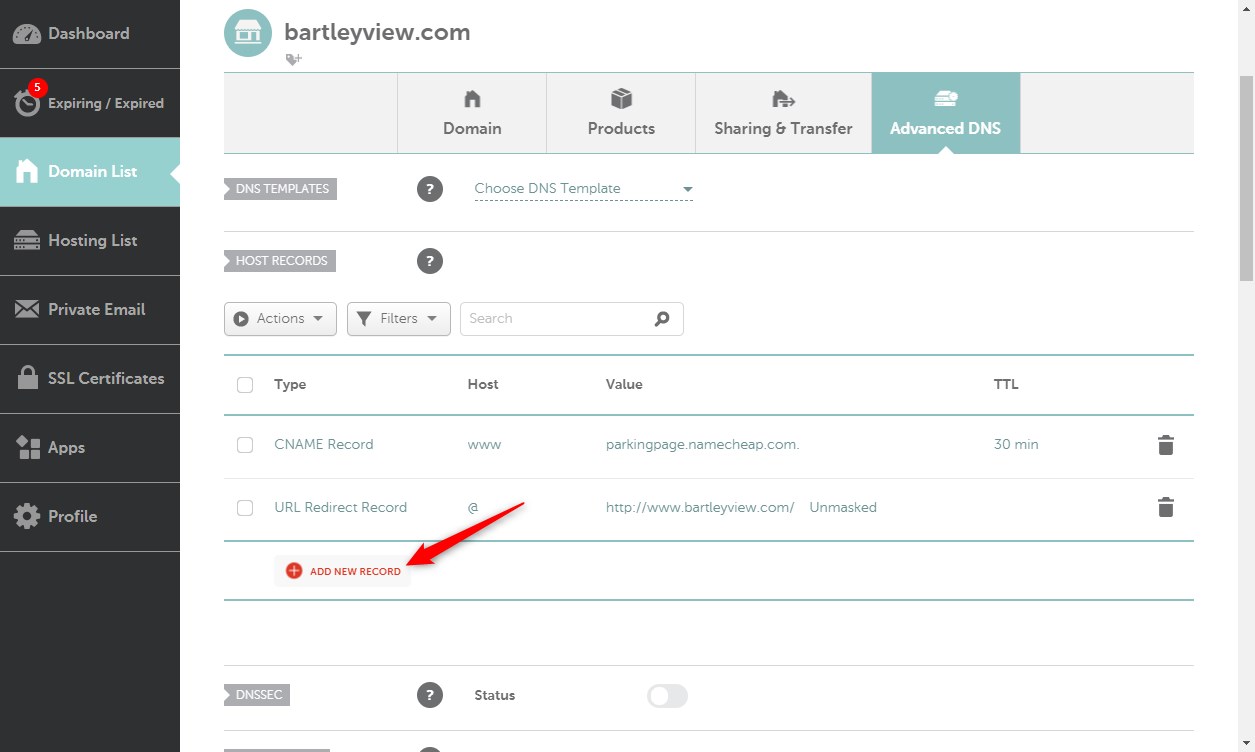
3. Click on Add New Record
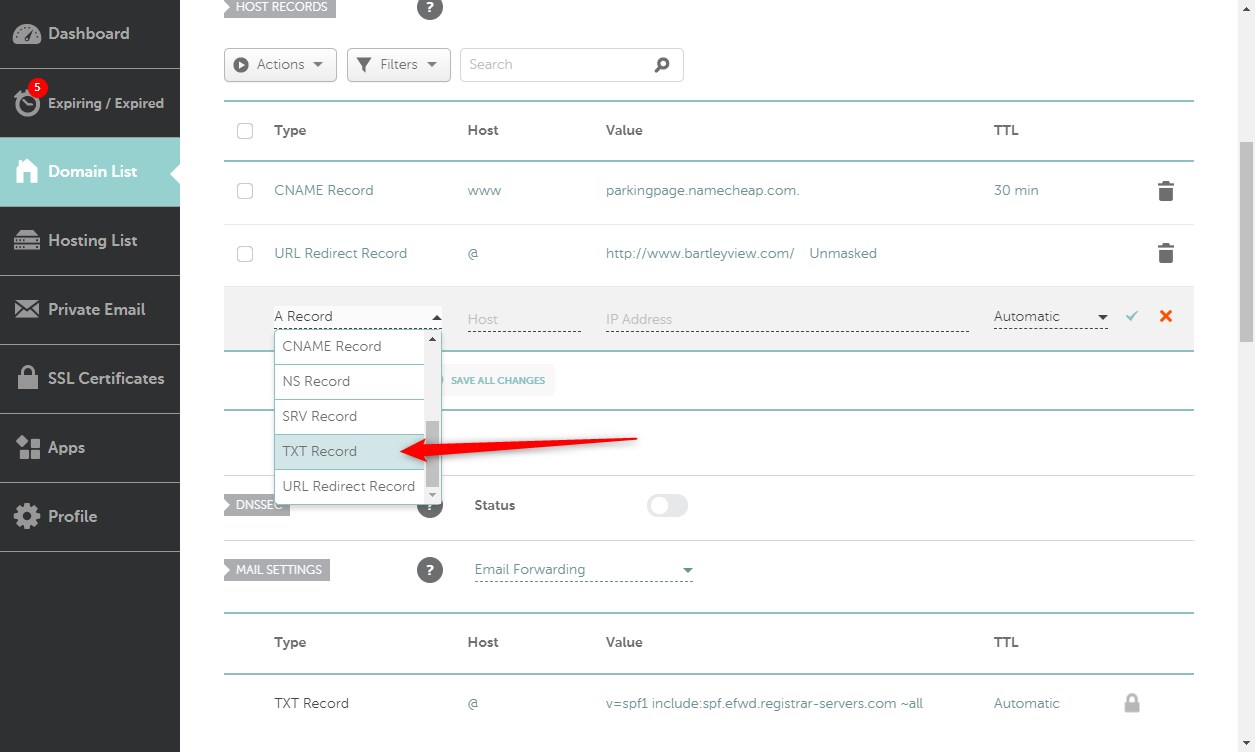
4. From the drop down menu, choose TXT Record
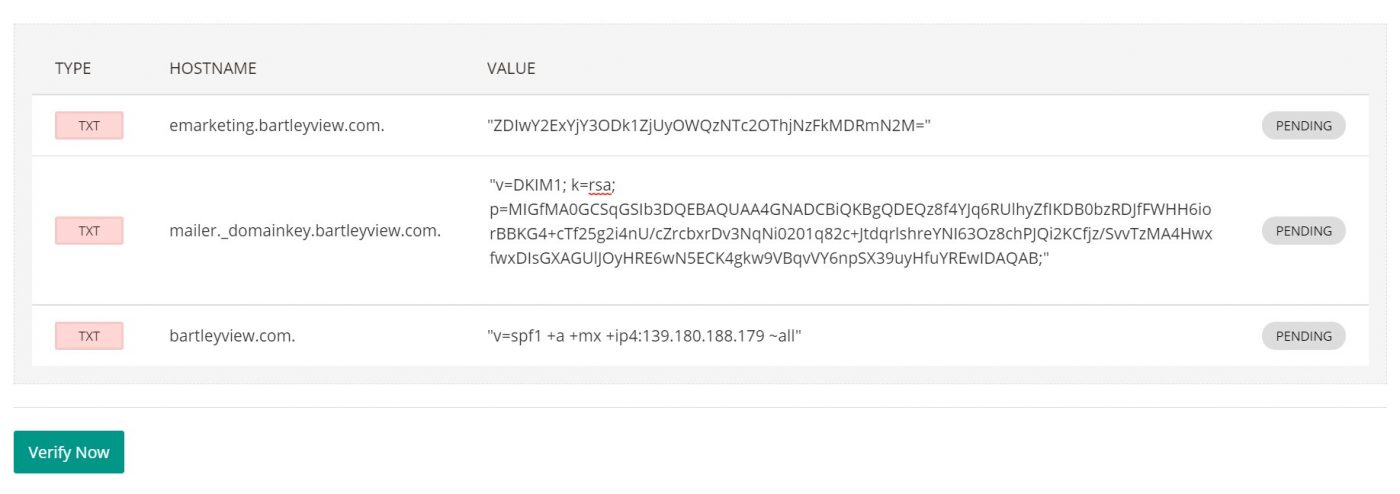
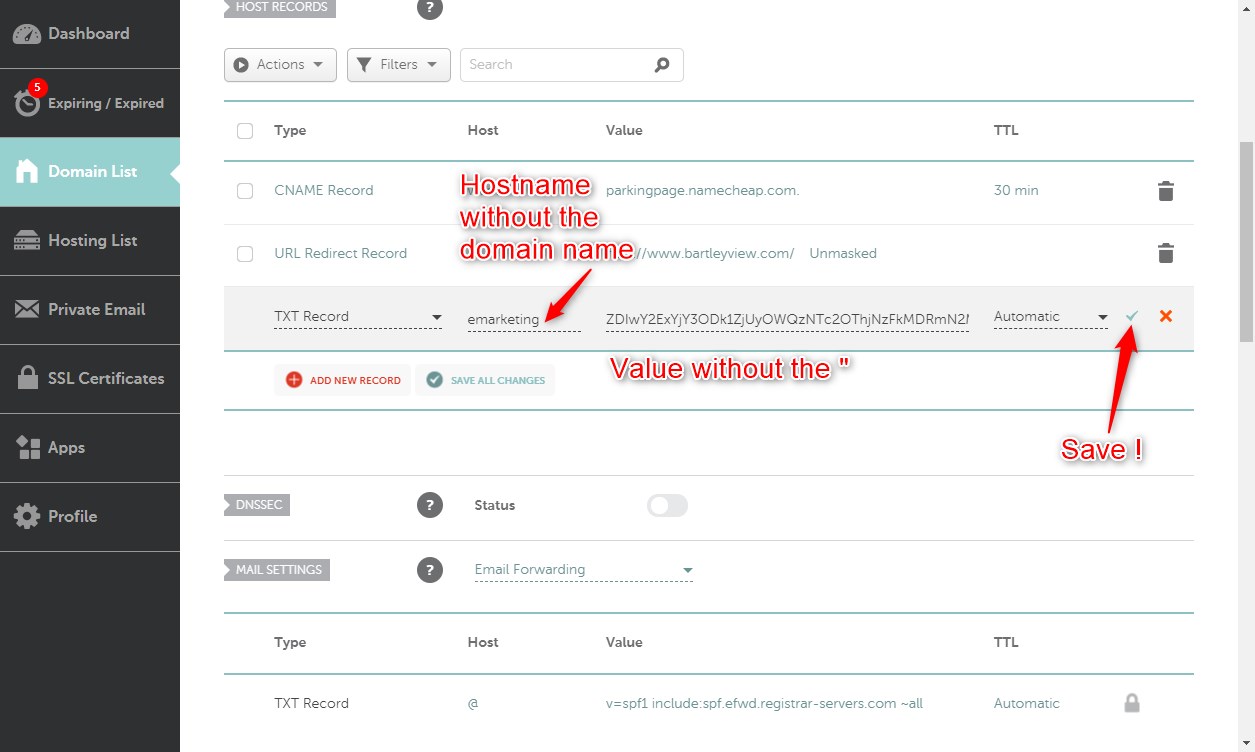
5. Add the 3 TXT records from the Sending Domains page in your account. Note that for domain registrars, you have to remove the domain name at the end of the Hostname. And when only the Hostname if shown, replace it with a @. Do not add the quotation marks ( ” ) in the Value. See the examples below.
6. All the 3 TXT records one by one making sure to remove the quotation marks and the domain name. Remember to click Save.
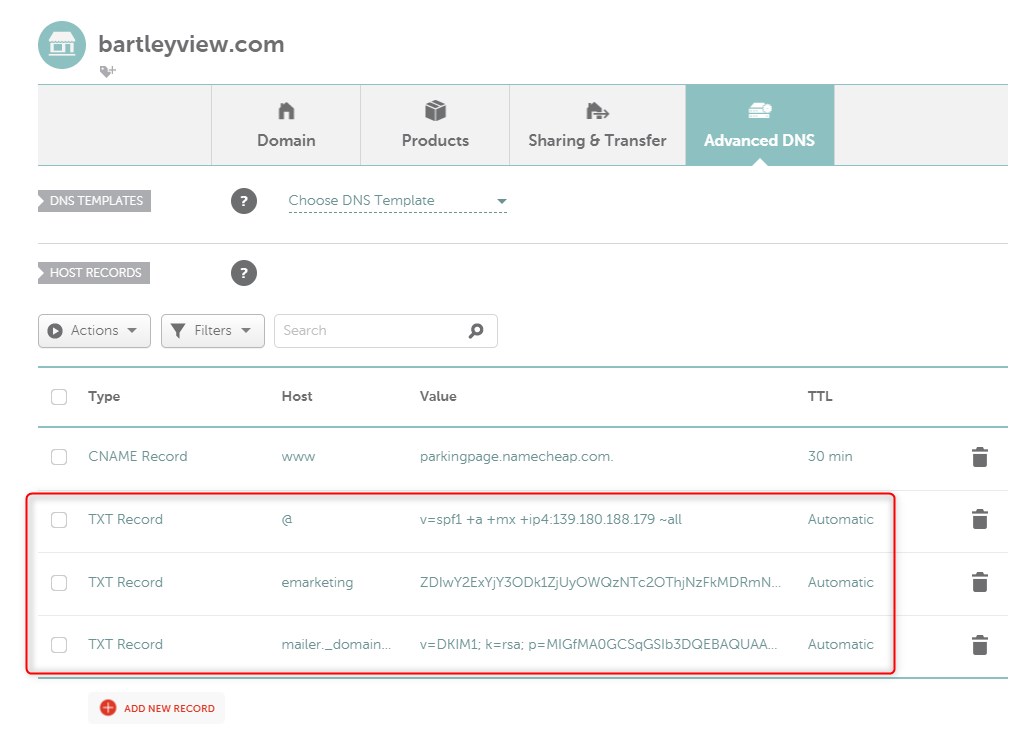
7. This is how the end result should look like.
Once your domain’s DNS records have been updated, it may take 24-48 hours for the information to propagate to servers around the world.
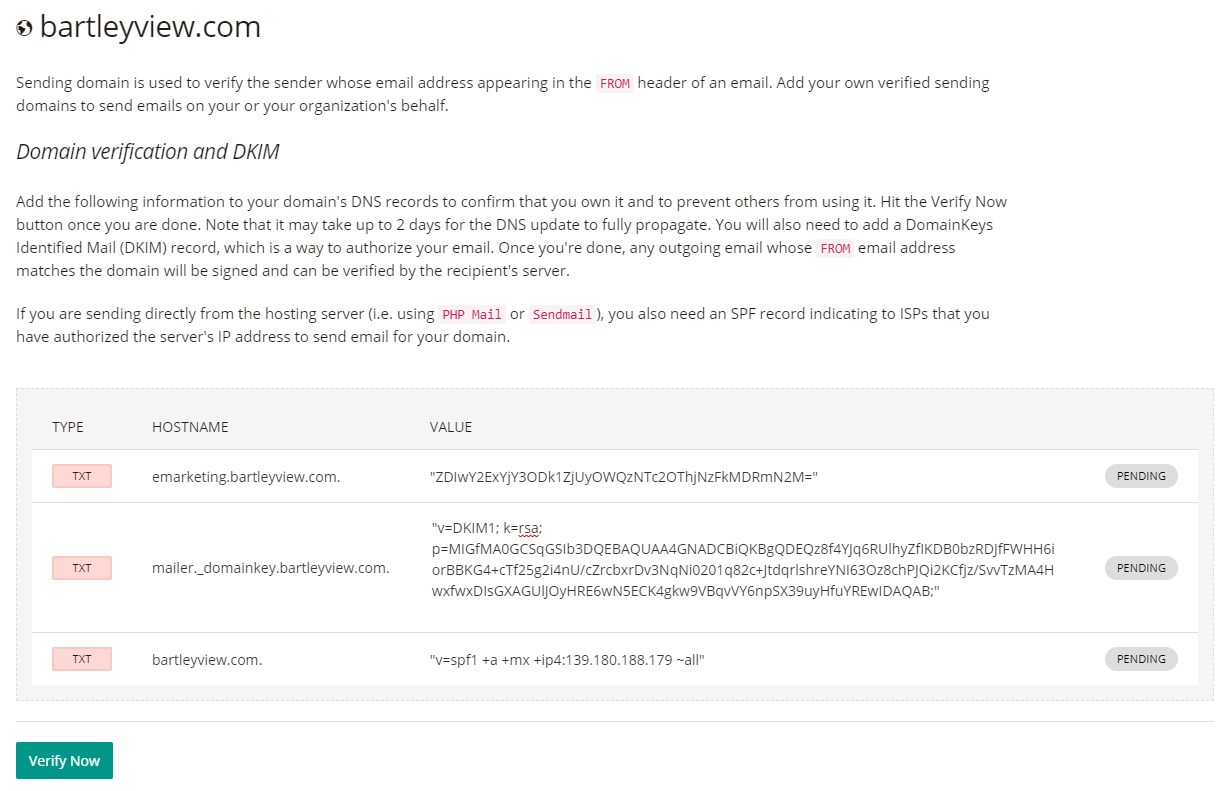
To check whether the DNS records have been updated, click the Verify Now button in your Domain Sending page of your account.
This option is for users who have their own website and have access to their backend control panel (cPanel).
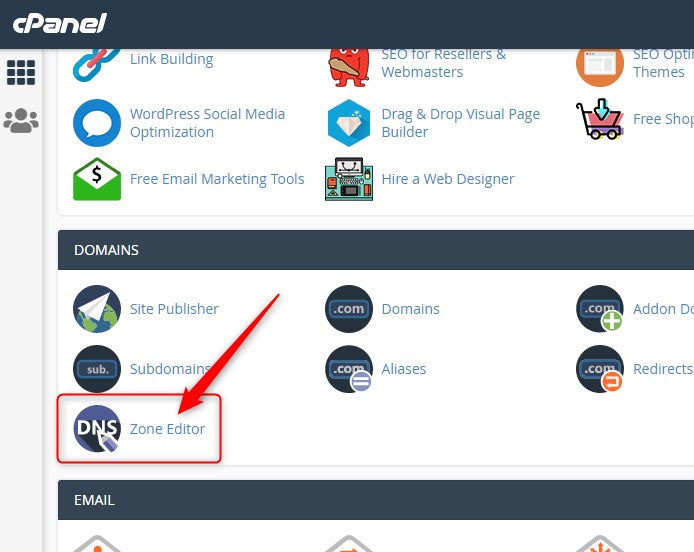
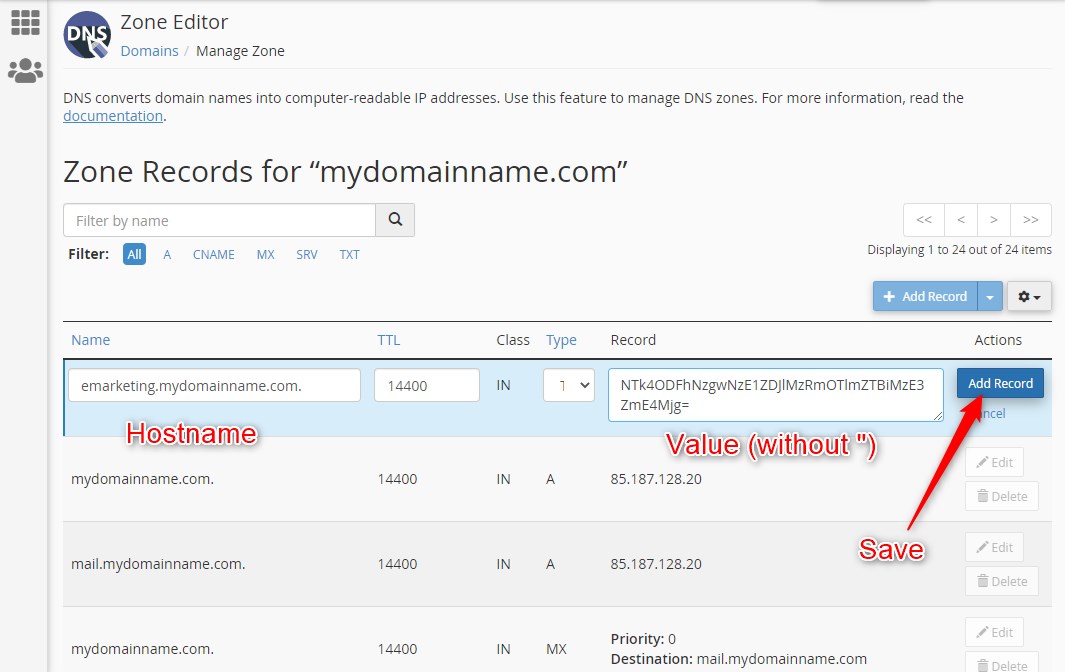
The first step is to login to your cPanel and click the Zone Editor icon.
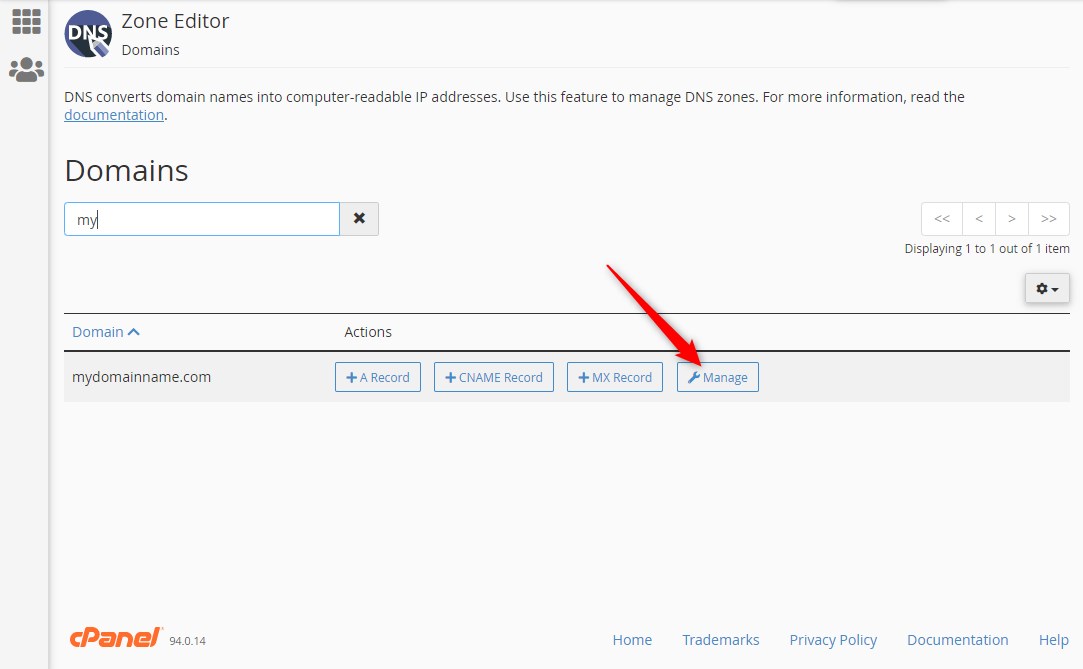
2. Find your domain and click on Manage
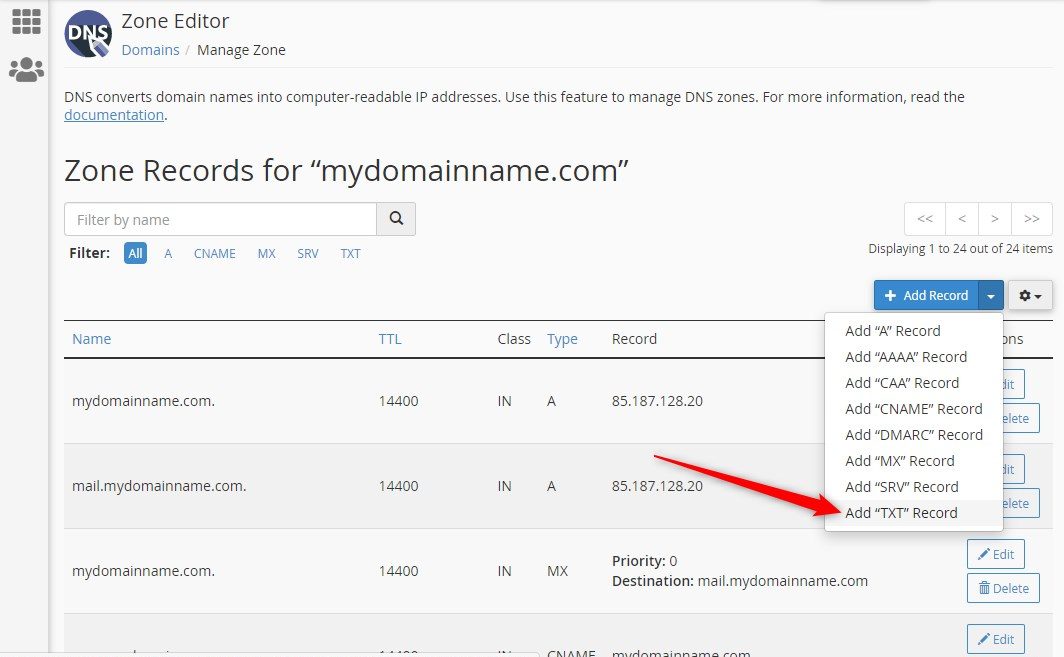
3. From the dropdown menu ,click on Add “TXT” Record
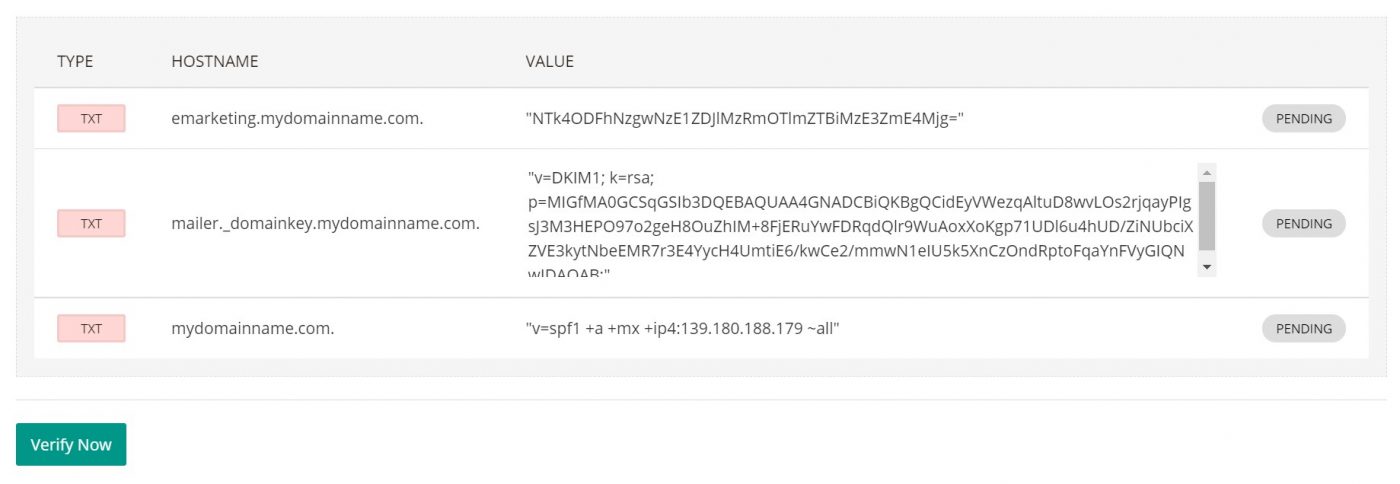
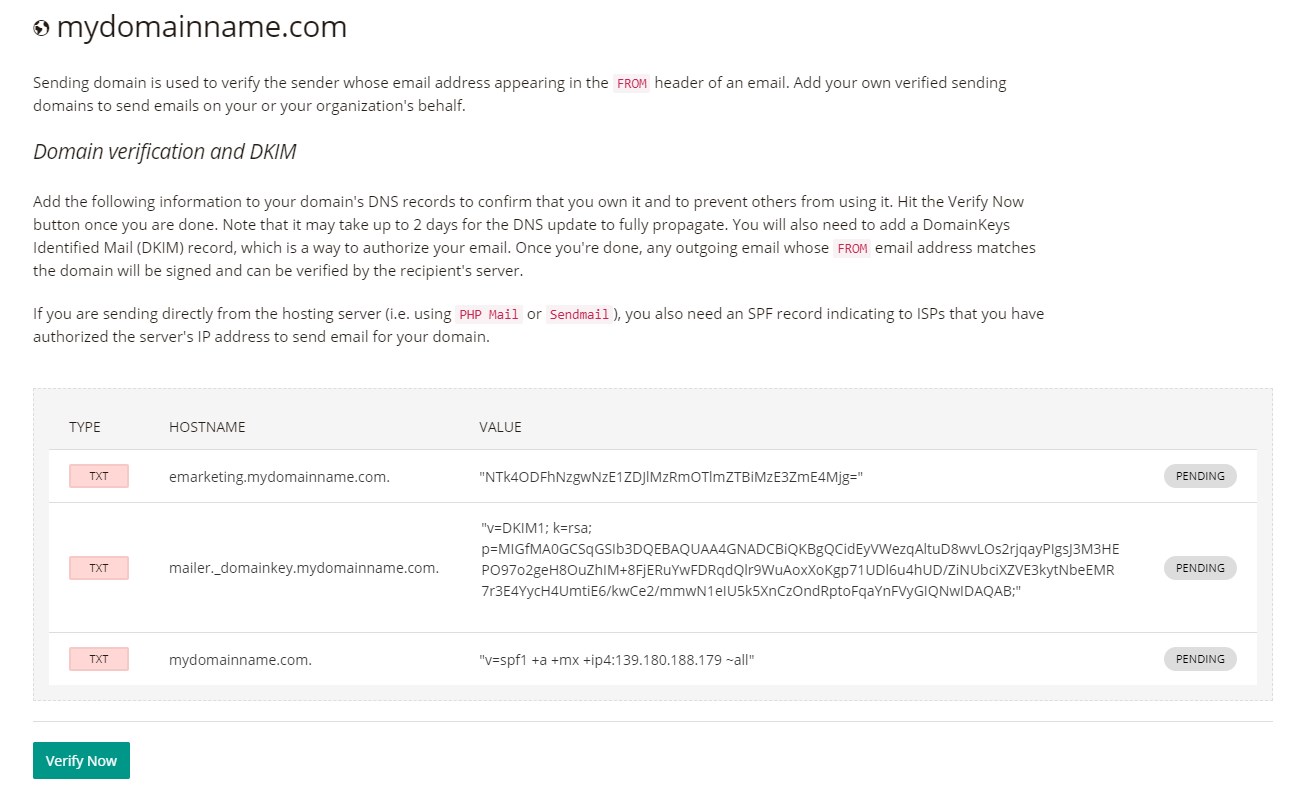
4. Add the 3 TXT records from the Sending Domains page in your account. Copy and paste the TXT record values into the Zone Editors fields. But omit the quotation marks from the Value record. Remember to click Add Record for each record entered.
5. You should see 3 new DNS records after completing this task.
After 24-48 hours, click the Verify Now button in your Domain Sending page of your account.
The next step is to upload your email subscribers to a list.